

We've got an early Christmas* present for our users - the LightBurn 2.1.00 Release Candidate is here!
(*or late Hanukkah! Or early Kwanzaa! Or late Kwanzaa? Someone look up when Kwanzaa is and tell us if we're early or late.)
Before we go over all the new features and improvements in 2.1, we have a couple important notes:
- If you're not familiar with what a Release Candidate is or how it works, a reminder: these are pre-release versions of LightBurn that have gone through several rounds of internal testing, and are now ready for a short period of public testing before official release. You can install LightBurn Release Candidates side-by-side with the full release version, so you can test without interrupting production. While RCs are very stable, you should keep an eye out for potential for bugs or unexpected behavior, and report anything amiss on our forum, or to Support@LightBurnSoftware.com. For more information on installing and using an RC, visit this page.
- Our team will be taking it easy between December 22nd and January 4th, so you should expect slower response times from our support staff over that period. Don't worry, our agents will still be putting in some hours over the break - most likely when they get sick of spending time with their loved ones.
With that out of the way, here's what we have for you:
Quick Nest
Nesting is a highly in-demand tool for laying out objects within a container shape to maximize spacial utilization - it's great for making sure you get the most out of a sheet of material without having to spend hours manually placing each graphic.
With LightBurn 2.1 we've got a limited version of nesting working - Quick Nest defines each object by the smallest possible rectangle that can fully contain it, then repositions all objects to squeeze them into a container in the most efficient possible layout. While not a full nesting solution, this feature packs a lot of power - more than enough for plenty of use cases. And have we mentioned that it's blazing fast?
You'll find Quick Nest in the Dock submenu of the Arrange Menu, or in the Docking Toolbar.
Multi-Camera & Network Camera Support
With 2.1, we've overhauled and expanded LightBurn's camera support, including a brand new interface for camera setup and control. Users will be able to add their camera, select from presets, and present feeds from multiple cameras in a decluttered "wall view" UI.
As part of this overhaul, we've added support for HTTP network cameras, which will greatly expand the range of hardware we're able to support.
Please note that this new UI is still under review, and likely to change before official release. We welcome your feedback!
Undo History Window
We've all been there - working away, editing up a storm, only to realize we regret all our life design choices. Then it's undo to the rescue.
LightBurn's internal undo list has always been unlimited, meaning you can undo any action you've taken, going back to the very start of your session - sometimes that just means hitting CTRL+Z several dozen times.
Starting in 2.1, you can go to Edit > Undo History and see a selectable list of your past actions. As you cycle through the list, you'll see a preview of your project's state, up to a given action, in your Workspace. After selecting an action, click OK to turn back time and confirm that prior state, undoing everything you've done since.
Tangent Circle Generator
Because our developers really like math, and the rest of us really like making cool designs, we've added a new Tangent Circle Generator.
Here's how it works: select 3 circles in your Workspace, then go to Tools > Generate Tangent Circle. LightBurn will show you all possible tangent circles (circles that touch each of your existing circles at exactly one point) in light red outlines. When you hover over an outline it will turn bold, indicating it's ready to be selected - click to select and create that tangent circle in your Workspace.
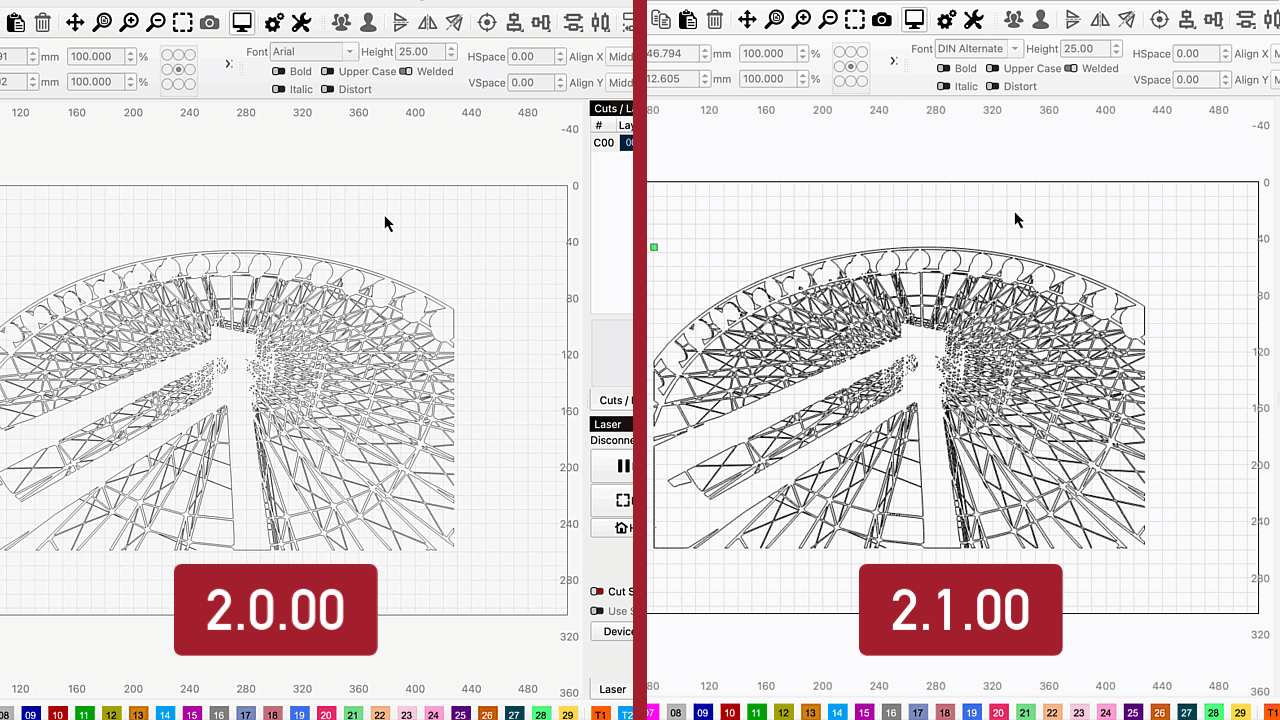
Cut Planner Speed Improvement
Updates don't just mean new features, they also mean feature improvements - our developers are constantly working to optimize LightBurn's performance.
In 2.1, we've made the cut planner much faster. That means when it's time to Preview or Start a complex project, LightBurn will now calculate and send the job in a fraction of the time it used to.
Design and Control Units Split - or Linked!
With LightBurn 2.0 we made Design and Machine units independent - in other words, you could edit graphics using imperial units, but set your speeds in metric, or vice versa.
That change caught some users off guard, so we've updated the behavior once more. You can now choose to set independent Design and Control units, or link them so that any time you change either unit type, the other changes too. Enabling linking brings back the original behavior from versions of LightBurn prior to 2.0.
As with 2.0, you'll find the option to adjust Design Units in your LightBurn Settings window, and Control units in your Device Settings window. The option to link Design and Control units is available in the Device Settings window.
Split Marking for Galvo Lasers
Split Marking allows users with Galvo lasers to mark graphics larger than their laser's work area using a linear or rotating axis.
You can find Split Marking setup in the Modes Toolbar - click the conveyor icon, then enter the necessary parameters for your linear or rotating axis, and toggle on Enable Split Marking. LightBurn will now automatically split up any graphics larger than your laser's work area, and move the external axis the appropriate distance to mark them in full.
Z Control for Galvo Lasers
We've added Z Control support for Galvo lasers with motorized Z axes. You can now home and jog your laser along the Z axis using the aptly named Galvo Z Control toolbar.
This is a first step toward adding additional Galvo marking features that rely on stepped movements of motorized Z axes. Stay tuned.
Other Notable Additions
- LightBurn now supports 16 bit depth map images, allowing users with Galvo lasers to achieve much more precise 3D engravings.
- You can now save LightBurn files in a special Template format. When you re-open a Template file and make changes to it, it will default to saving as a standard .lbrn2 file, so that the original Template is never accidentally overwritten.
Read the full change log here!